1 Settings
WIP…pre spelling check
Before getting started, let’s set the development environment. There are many ways to develop and execute JavaScript. For this tutorial, I use VScode, which has great integrations with JavaScript, HTML, and CSS and seamless integration with Docker. In addition, it has great integration with Quarto, which was used to create this document. If you want to follow the same settings, check the instructions below.
1.0.1 VScode Settings for JavaScript
If you don’t have VScode installed, you can download and install it directly from the VScode website. I also use the following extensions:
- Live Server extension, which enables you to launch a local development server with a live reload feature for static & dynamic pages
- Dev Containers extension, supporting development on VScode with Docker containers
1.0.2 Setting Docker Environment
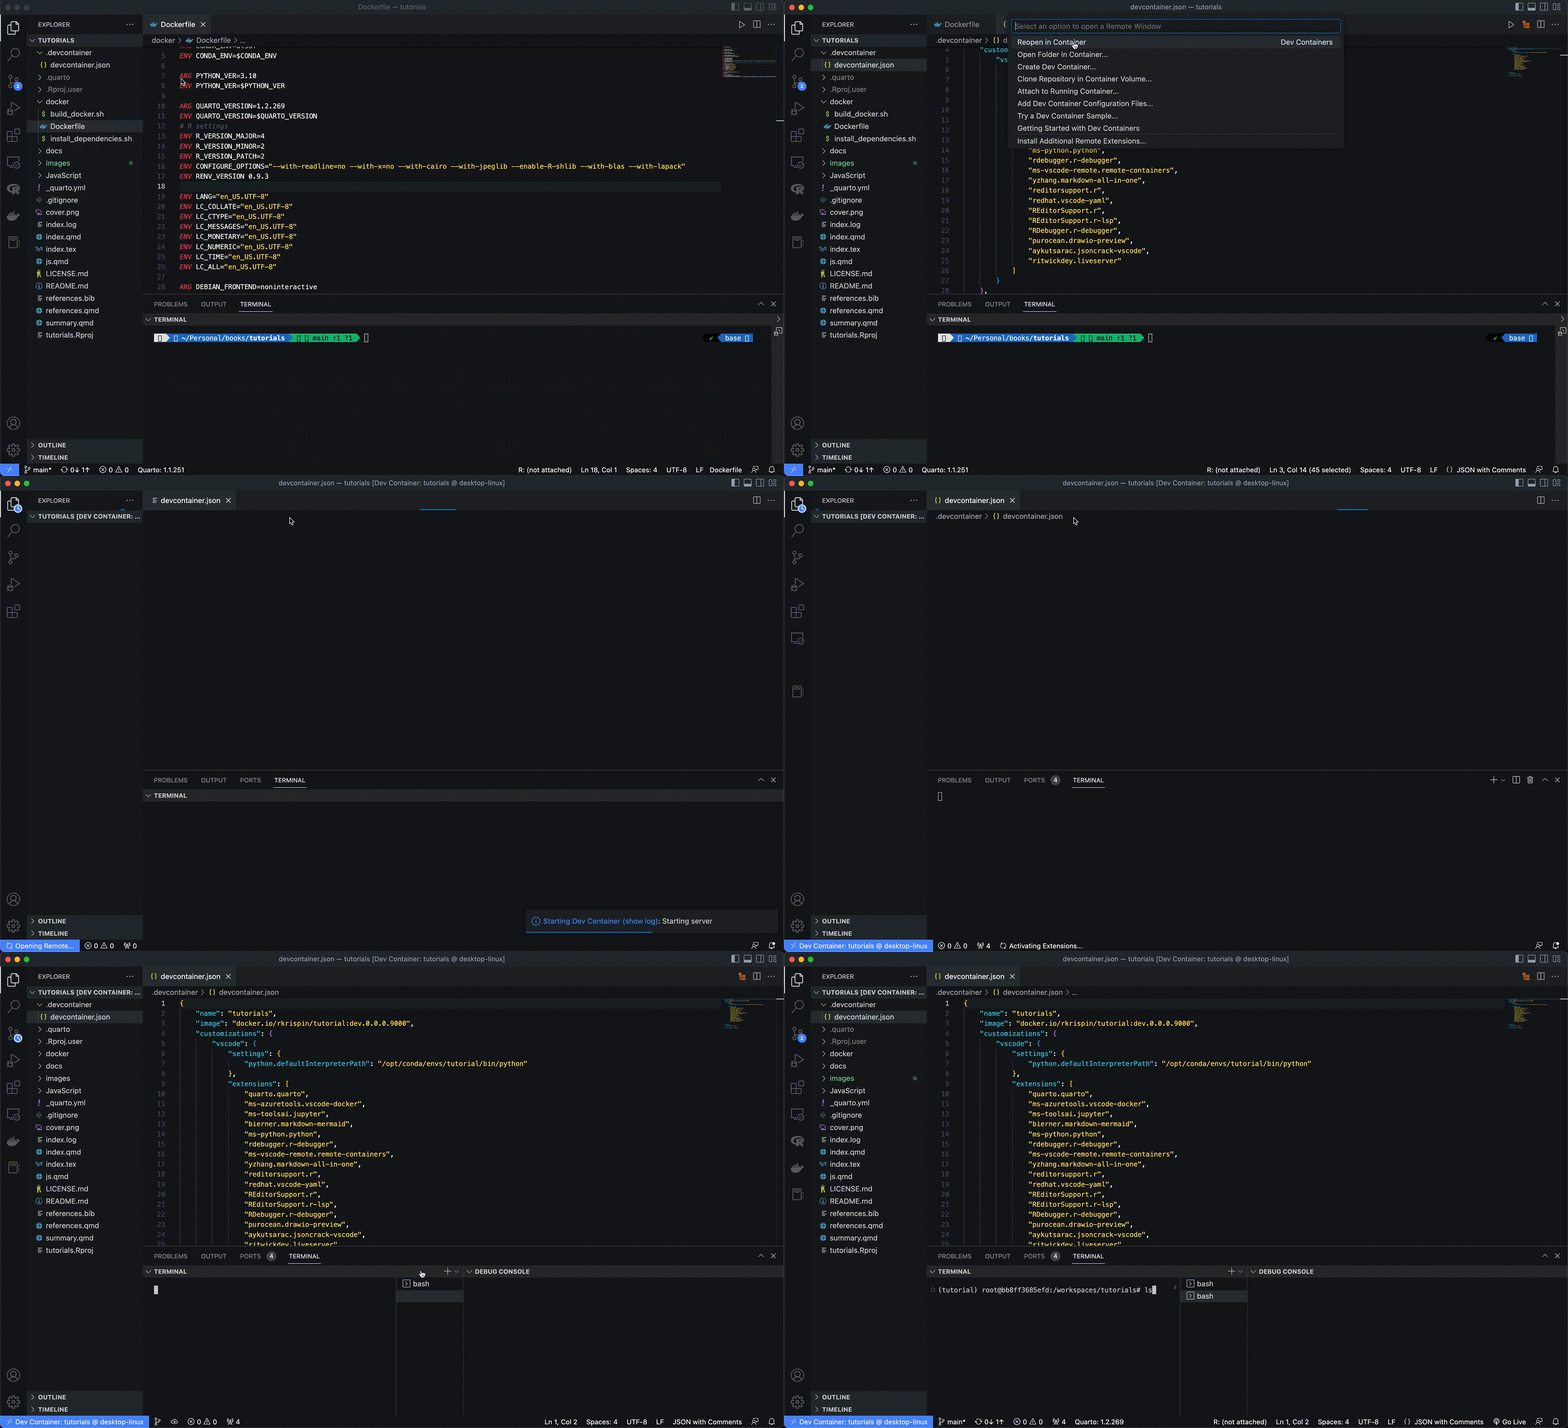
One of the main reasons I love using VScode is the seamless integration with Docker. It enables you to develop in your local folder while executing the code inside the image. Here is what you need to set your VScode to run inside a Docker image:
- Docker Desktop (or equivalent) install on your machine (download and install it from here)
- Docker extension for VScode
- Set the supporting image, here are the Docker settings I am using for this tutorial
- Create the devcontainer.json file with your container settings (image name, environment variables, extension names, etc.), here is my
devcontainer.jsonfile setting - Open the folder inside the container (see the screenshot below)

You can read more about setting and using Docker with VScode on VScode’s documentation.
If you want to leverage the tutorial Docker settings, you can clone the repository and follow the next steps:
- Open the tutorial repository’s folder on VScode
- Open the
Command Palette(⇧⌘P in Mac, Ctrl+Shift+P in Windows) or use theOpen Remote Windowbutton (on the bottom left side, see the screen recording above) and typeOpen Folder in Container.
Note: It might take few minutes on the first time opening the container, as it pull the docker image from Docker Hub.
1.1 Workflow
JavaScript (also known as JS), is one of the most popular programming languages for web development. It is typically used to create web page applications, mobile apps, games, and great data visualization tools (D3, Observable Plot, Leaflet, Charts, etc.). You can run JavaScript on your web browser (e.g., Chrome, Safari, Firefox, etc.):
Screen record here*
While you can use your web browser as a consul for ad-hoc code tests, the development of JS applications is done inside a script using a code editor such VScode, notepad, etc. It is common to have JS code embedded inside HTML script (or call JS script from HTML script).
1.1.1 File structure
In this tutorial, we will adopt the basic framework for running JS code on the browser by setting a web page with an HTML file (index.html) and leveraging it to call a JS file (index.js) with our JS code. In addition, we will use a CSS file (style.css) to set the web page style. I will set those files under the JavaScript folder:
.
├── index.html
├── index.js
└── style.ccs
Note: For convenience, I placed the three files in the same folder. However, if you wish to arrange it differently, you can easily reference the index.js and style.css file paths from the index.html file.
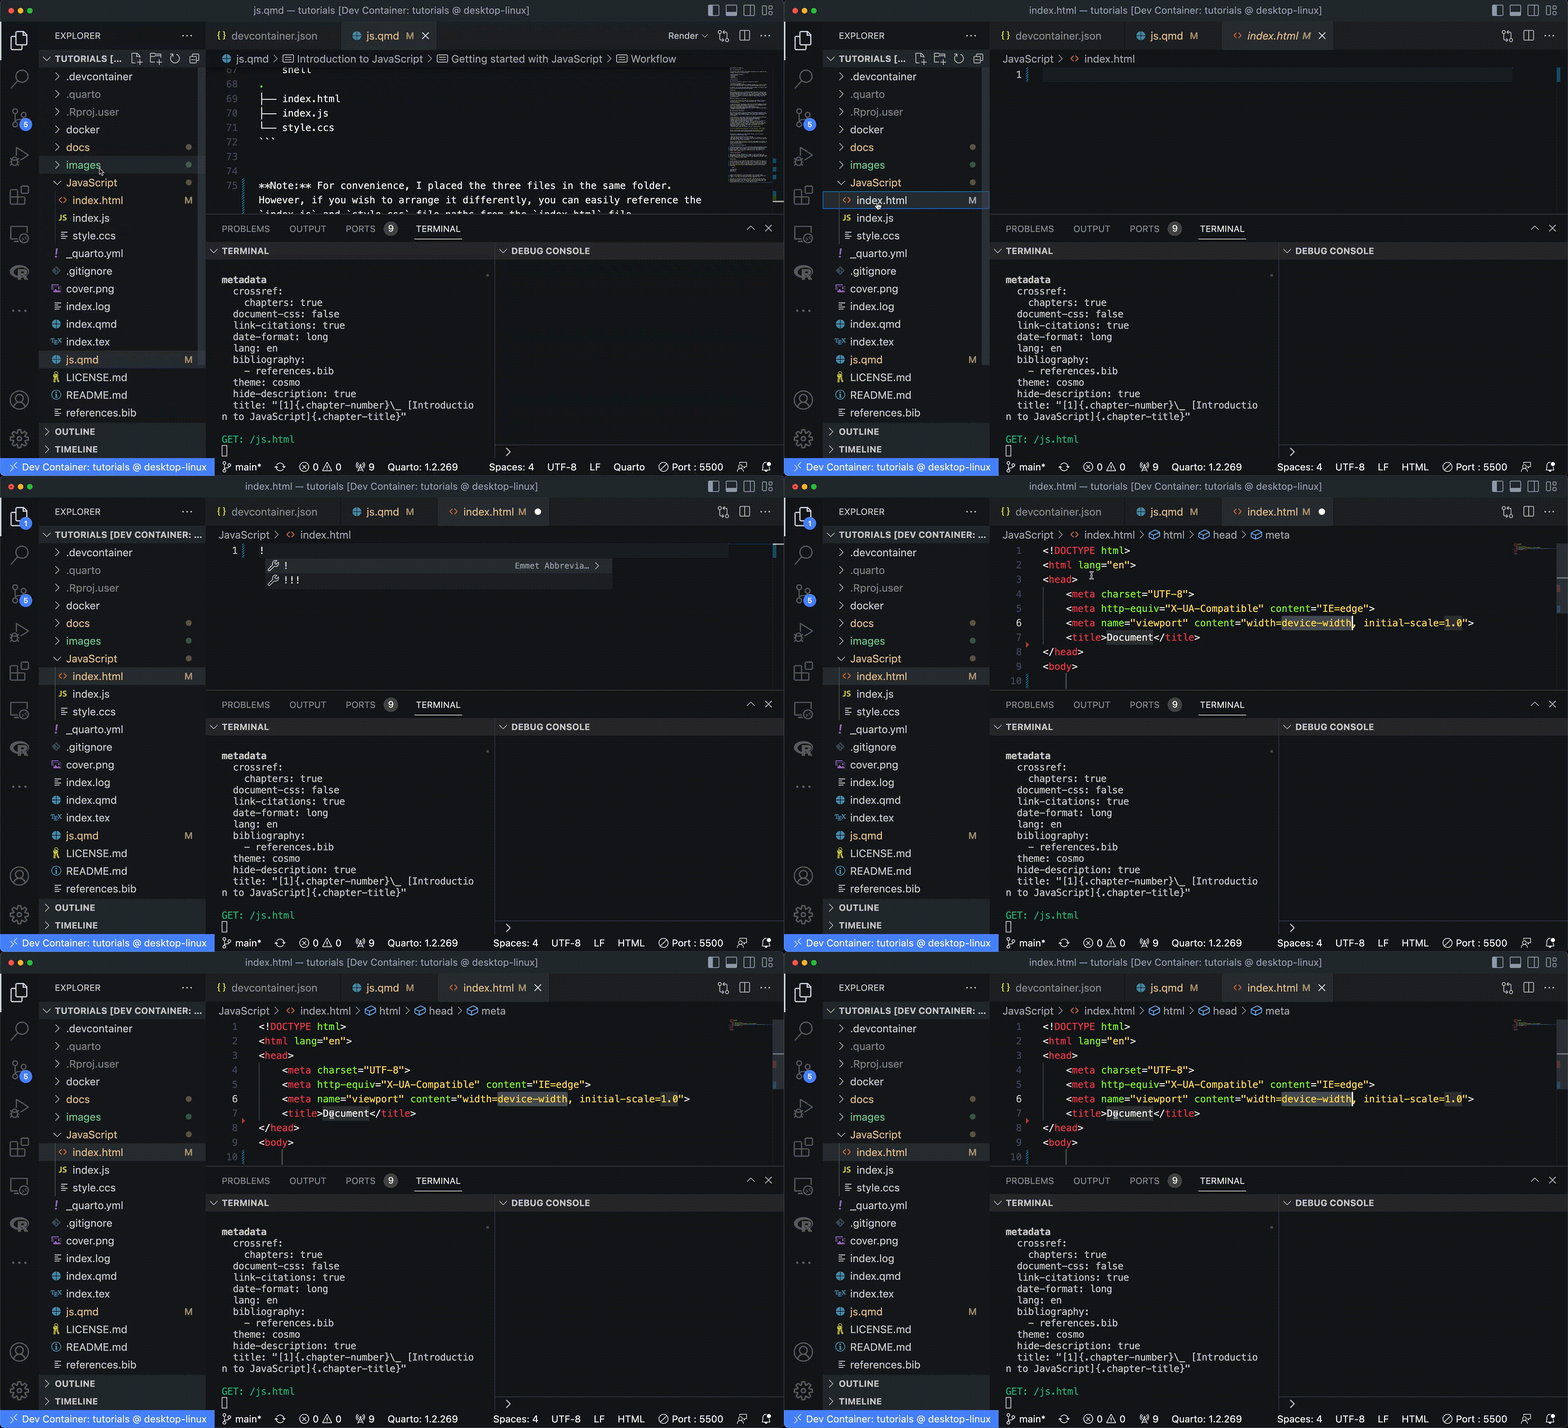
Don’t worry if you are not familiar with HTML or CSS. We will use the basic templates to set those files. Let’s start by creating three empty files using the file names above. To set the HTML file, we will use the VScode HTML code snippet template by typing the ! symbol and press enter:

In a nutshell, the HTML language is based on code chunks nested by tags. The tags define the code’s functionality. Here is the most common tag structure:
<tag_name> arguments and expressions </tag_name>In this HTML structure, the element is nested by the tag name. In both cases, the tag is enclosed within < > brackets, where the closing tag is marked with / symbol before the tag. For example, we will use the title tag to define the web page title:
<title>My Title</title>The second type of tag typically defines an attribute with a single tag enclosed with <> brackets. For example, the meta tag defines the HTML page metadata:
<meta charset="UTF-8">In this case, the charset argument defines the character encoding method as UTF-8.
The HTML file we created contains the following two main elements:
head- Use to define the page metadata and attributesbody- Use to set the page content
An excellent resource to read about the head and body tags, or any other tags, is the w3schools website.
index.html:
<!DOCTYPE html>
<html lang="en">
<head>
    <meta charset="UTF-8">
    <meta http-equiv="X-UA-Compatible" content="IE=edge">
    <meta name="viewport" content="width=device-width, initial-scale=1.0">
    <title>Document</title>
</head>
<body>
</body>
</html>
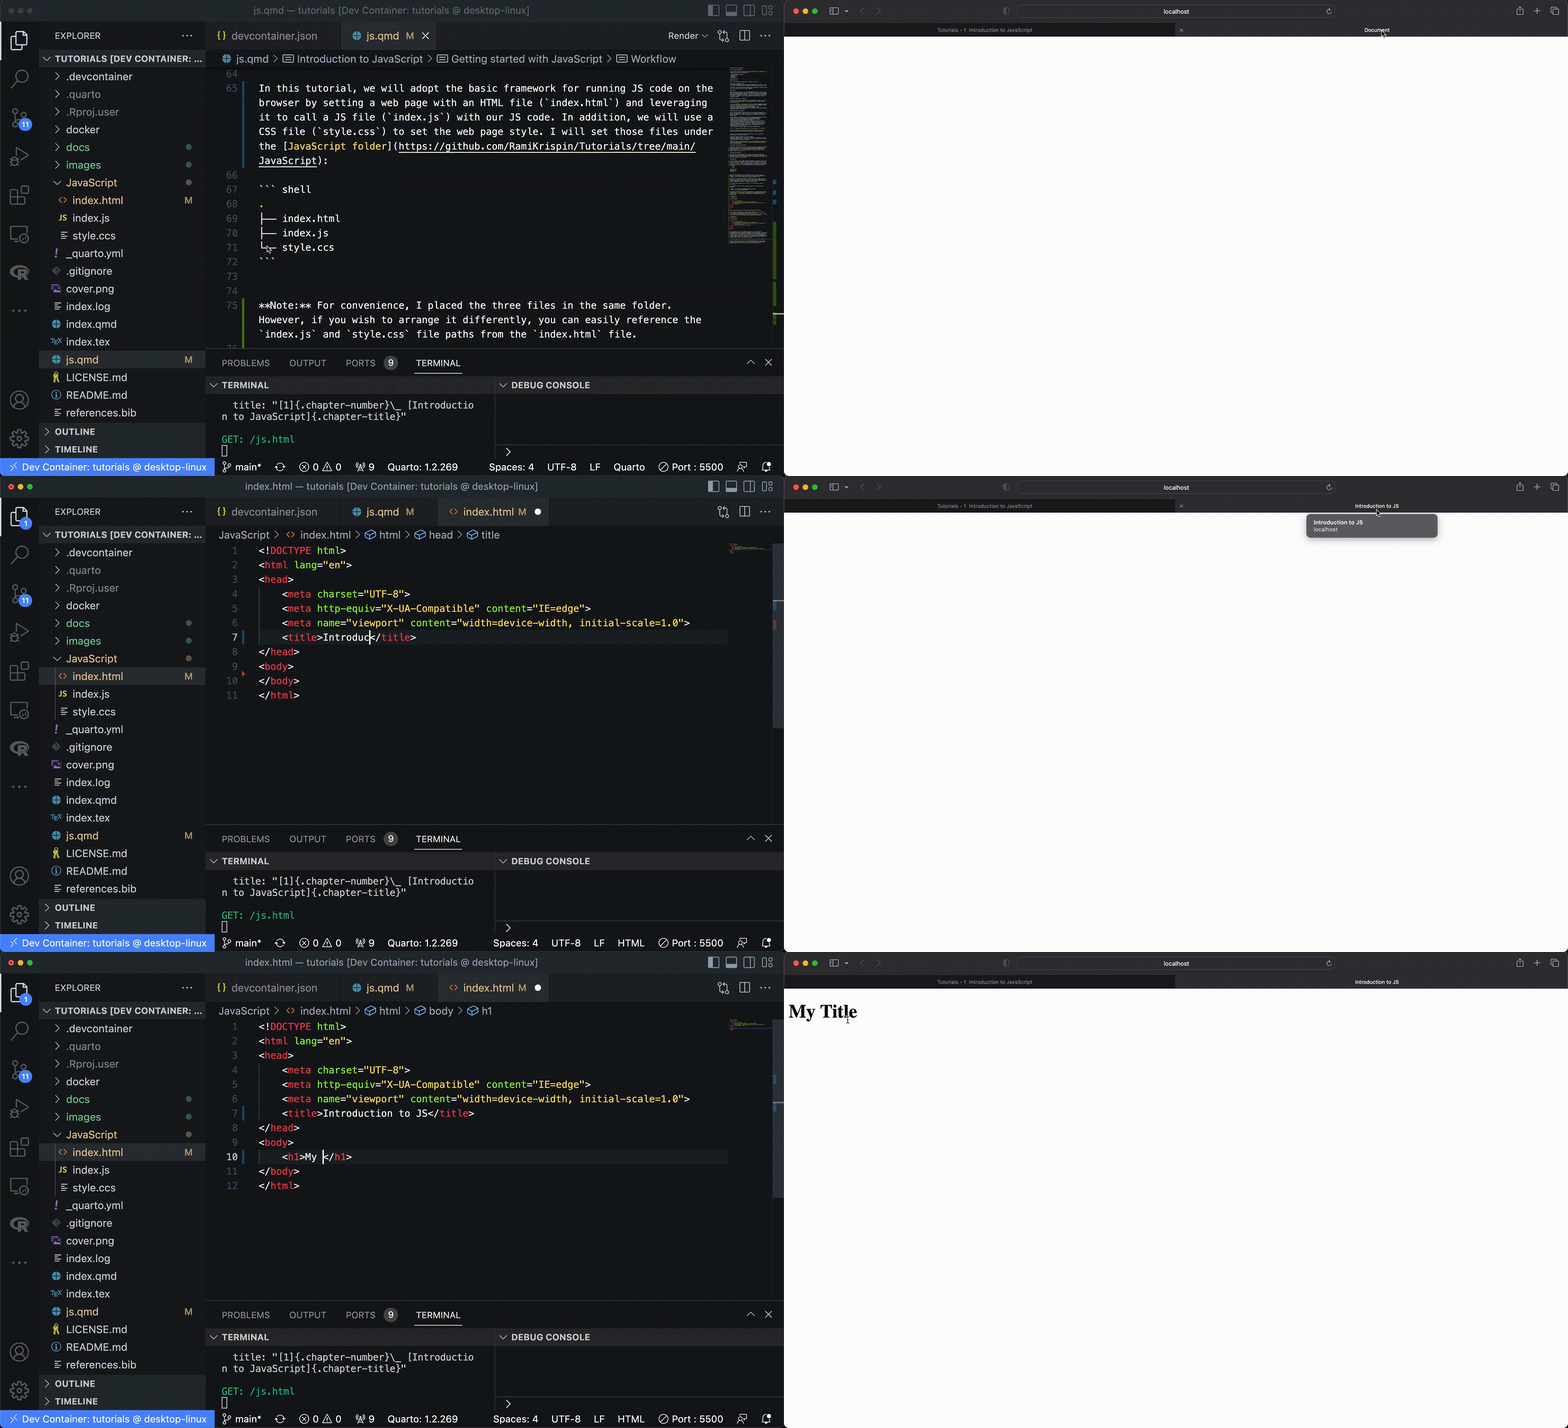
Here are a few things we are going to modify and add to this file:
- The
<title>tag under the<head>defines the web browser’s tab title. Let’s modify it from Document to Introduction to JS - Set the page CSS by linking the
style.cssfile to the page<head>element using the link tag
index.html:
<!DOCTYPE html>
<html lang="en">
<head>
    <meta charset="UTF-8">
    <meta http-equiv="X-UA-Compatible" content="IE=edge">
    <meta name="viewport" content="width=device-width, initial-scale=1.0">
    <title>Introduction to JS</title>
    <link rel="stylesheet" href = "style.css">
</head>
<body>
</body>
</html>
Here is a simple CSS setting we will use to define the HTML page font and headers size:
style.css
@import url(https://fonts.googleapis.com/css?family=Lato:400,700,400italic);
@import url(https://fonts.googleapis.com/css?family=Roboto+Condensed);
@import url(https://fonts.googleapis.com/css?family=Roboto+Mono);

body {
  font-family: 'Lato', Arial, sans-serif;
  font-size: 26px;
}
h1, h2, h3, h4 {
  font-family: 'Roboto Condensed', 'Arial Narrow OS', Arial, sans-serif;
  font-weight: normal;
}
1.1.2 Live Server
Last but not least, let’s see how the VScode’s live server extension is working and how to leverage it in our workflow. This extension will enable us to instantaneously review the changes we apply to the index.html file on the web browser as we update and save the code. If you have wide screen, I recommand to open side-by-side VScode and your default browser and see, while coding, the changes in the browser. To launch the live server on VScode, go to the EXPLORER tab left side and right-click on the index.html file. That should pop up a window with options, select Open with Live Server option:

1.2 Executing JavaScript code
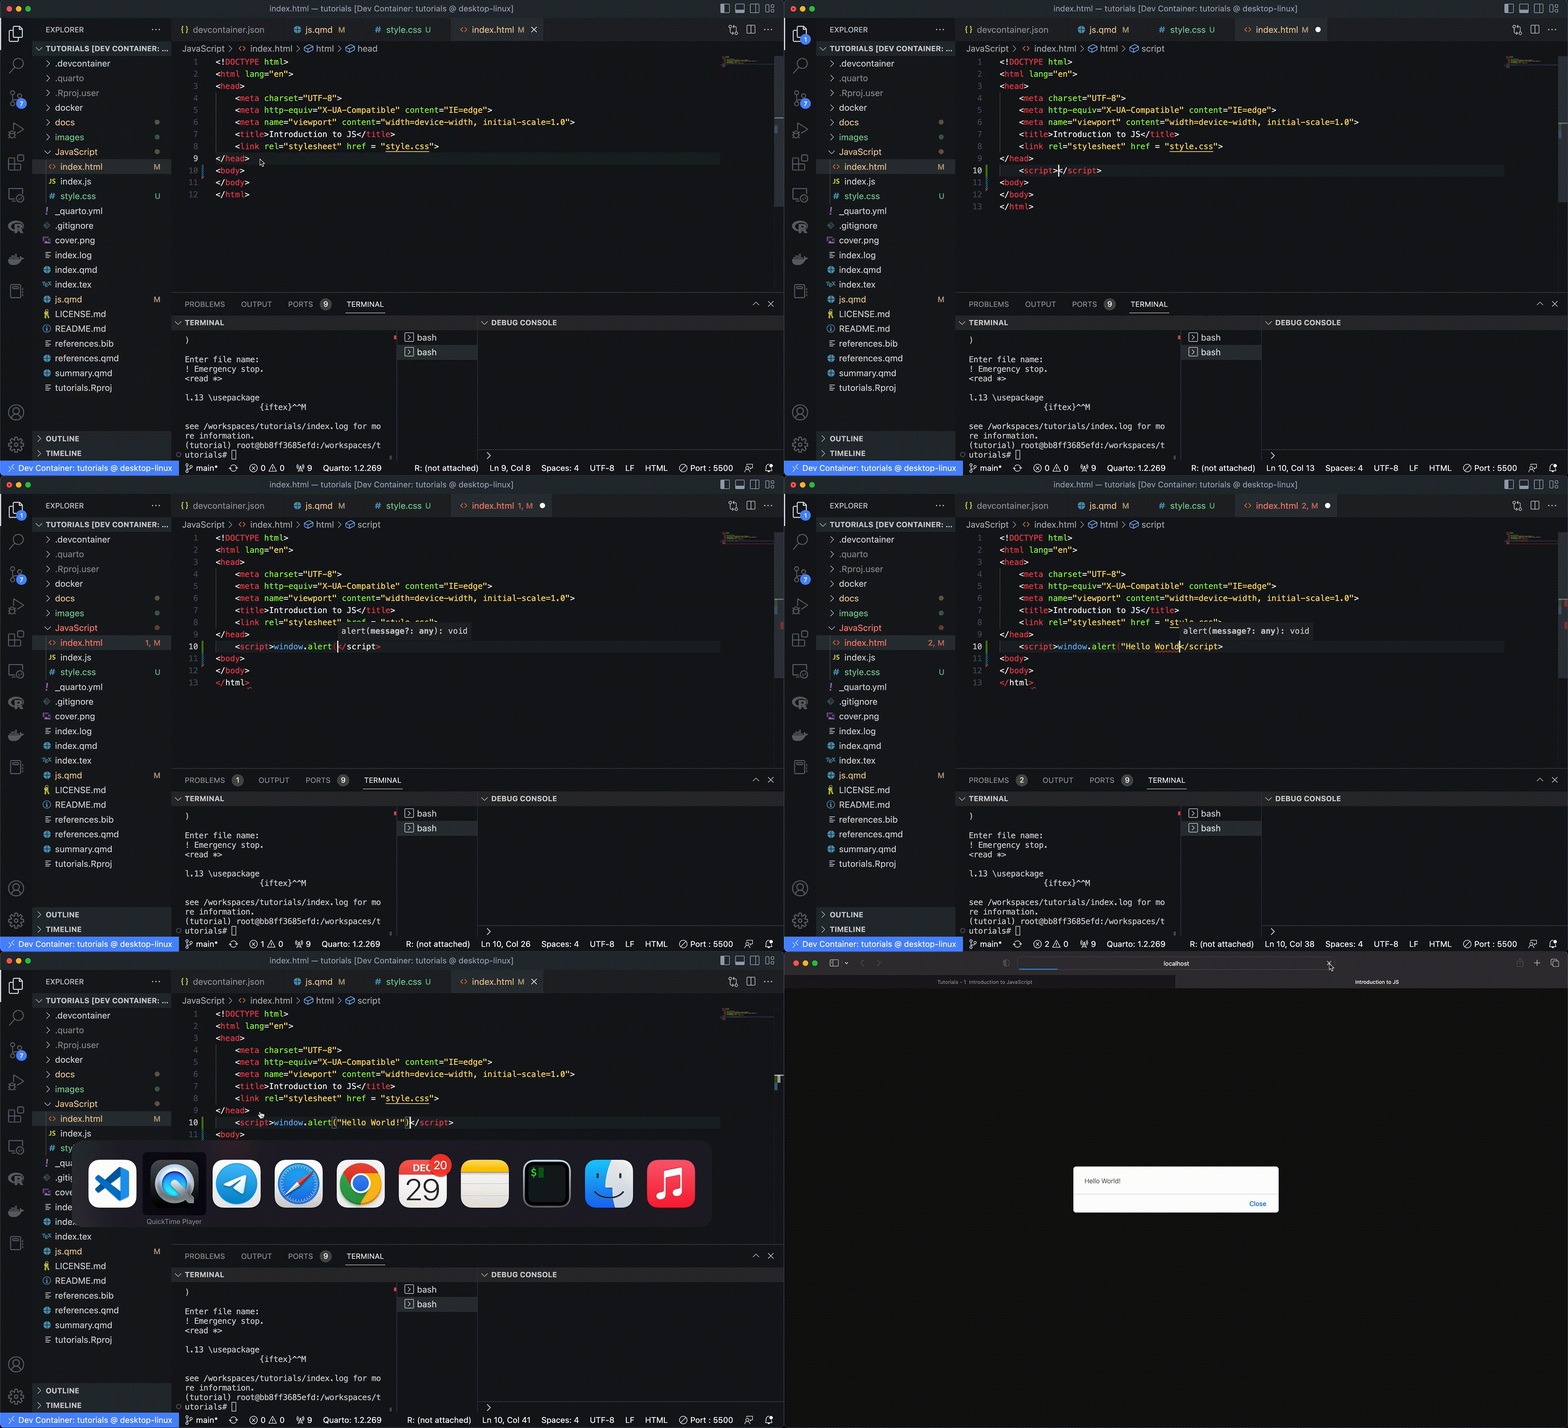
Throughout this tutorial, we will use the index.html file to run JS code on the HTML page using the script tag. As the name implies, the script tab enables us to embed JS code within an HTML file or call and execute an external JS script. For example, let’s use the JS window.alert function to pop an alert window and print Hello World!:
window.alert("Hello World!")Here is how you would embed your JS code within the HTML file using the script tag:
<!DOCTYPE html>
<html lang="en">
<head>
    <meta charset="UTF-8">
    <meta http-equiv="X-UA-Compatible" content="IE=edge">
    <meta name="viewport" content="width=device-width, initial-scale=1.0">
    <title>Introduction to JS</title>
    <link rel="stylesheet" href = "style.css">
</head>
<body>
    <script>window.alert("Hello World!")</script>
</body>
</html>
Alternatively, you can use the script tag to call and execute the JS script file. Let’s copy our JS code to the index.js file and call it with the src argument of the script tag:
index.js
window.alert("Hello World!")index.html
<!DOCTYPE html>
<html lang="en">
<head>
    <meta charset="UTF-8">
    <meta http-equiv="X-UA-Compatible" content="IE=edge">
    <meta name="viewport" content="width=device-width, initial-scale=1.0">
    <title>Introduction to JS</title>
    <link rel="stylesheet" href = "style.css">
</head>
<body>
    <script src = "index.js"></script>
</body>
</html>
In both cases, here is the expected output:

That’s it! We are ready to write our first JS code!